Here is the model after the first painting and weathering attempt. I was not satisfied with the effect as it was quite a bit more aged than I had intended. This would be great for a 1920's lumbering operation but not for what I have in mind for a late 1890's engine.
I used some Testors stripper to remove the paint and took another shot at it. I brush painted Polly Scale Engine black. Two lightly thinned coats of black followed by two coats of Future floor wax. This is how it looks at this point. I had it down at the club yesterday and put in four hours of break in time on it. It ran okay at moderate speed but is a little sluggish at slow speed, maybe I will need to replace the motor with a more efficient one.
As you can see I have not lettered the engine. I have no idea of what to name my railroad. I intend it to be an imaginary Wisconsin branch line in the late 1890's interchanging with the C&NW and CM&StP but a name truly eludes me. Maybe the best bet is to letter it for the CM&StP and then I won't have to spend any more time not building a railroad because I cannot think of a name!
Pages
Sunday, March 10, 2013
Tuesday, February 19, 2013
Phase One of American Rebuild Complete
The addition of parts is complete. Here are some pictures of the model at this point. It is pretty easy to tell what has been changed and added before the model is painted. The majority of parts are from Precision Scale with a smattering from Cal Scale.
Fireman's side of engine. Domes, stack, headlight, bell and check valve are PSC. Whistle and globe valve are Cal Scale. The cab roof vent is also built up from styrene. The tender has had the coal bunker sides extended (styrene) and re-railing frogs have been added to both sides.
Engineers side of engine. The air pump, regulator and control valves are Cal Scale. I added an air tank under the boiler between the cross heads. I used the large tank from a Cal Scale express reefer casting set.
Front of engine. The signal lamps are PSC castings and the air hose is a Cal Scale part. The pilot is built up from brass strip material. The coupler is a Sargent. I was an early adopter of this line of couplers. Shortly after these hit the market I recall bringing some freight cars to the Naperville meet with the couplers installed. Unfortunately, none of the attendees paid much attention to them or even seemed to appreciate there significance. Oh well, that's what happens on the bleeding edge.
Tender rear. Built up pilot, Cal Scale brake hose and Sargent coupler.
Here are a couple of "rods down" three quarter views.
Fireman's side of engine. Domes, stack, headlight, bell and check valve are PSC. Whistle and globe valve are Cal Scale. The cab roof vent is also built up from styrene. The tender has had the coal bunker sides extended (styrene) and re-railing frogs have been added to both sides.
Engineers side of engine. The air pump, regulator and control valves are Cal Scale. I added an air tank under the boiler between the cross heads. I used the large tank from a Cal Scale express reefer casting set.
Front of engine. The signal lamps are PSC castings and the air hose is a Cal Scale part. The pilot is built up from brass strip material. The coupler is a Sargent. I was an early adopter of this line of couplers. Shortly after these hit the market I recall bringing some freight cars to the Naperville meet with the couplers installed. Unfortunately, none of the attendees paid much attention to them or even seemed to appreciate there significance. Oh well, that's what happens on the bleeding edge.
Tender rear. Built up pilot, Cal Scale brake hose and Sargent coupler.
Here are a couple of "rods down" three quarter views.
Thursday, February 14, 2013
Something For Me
I started this on Sunday Feb 10, as I had nothing to work on for NAPM. This is a Bachmann American lettered for the B&O. After disassembling the model I stripped off the domes, stack, light and bell and then removed the cast on piping. I have a supply of brass details so over the last few days (between work on tenement) I added the details and plumbed up the engine. I am working from some photos of some early DSS&A 4-4-0 engines. One has a neat drop step pilot as would be seen in switching service, I think that is the direction I will head.
NAPM Backdrop ELA Tenements
I plotted the angle on the roof section and then sliced the two sections apart.
Next I cut the angle. It does take some courage to attack an $80 model with a hack saw!
Next I tacked the three wall sections together with CA. When the glue hardened I then added a substantial bead of five minute epoxy to the joints.
I added the second rear wall segment and then fitted the roof. The roof is shorter than the side walls so I butted the front edges to keep the side wall step downs even.
These photos show the mismatch on the rear and slight gap in the front.
I filled the gap in the back with some 1/4 x 1/8 basswood strip material. Luckily it was an exact fit. I also used some of the same strips to continue the side walls. An 1/8 sq strip was used to fill in the top of the right rear wall.
These are the other two sections assembled.
Again a filler strip was added at the rear to fill the gap in the roof.
On Wednesday I spent some time painting the right hand building. I spray the interior black in the event that someone at some time might want to install lighting. That is not my bag, I just build models! The next step will be weathering.
Tuesday, February 12, 2013
NAPM East LaSalle Backdrop
This is the block of buildings in there positions along the backdrop. The yard seen in the foreground is the Seeboth St coach yard.
The above photo is of the block east of the prior one.
This is the east end of the above block.
Today I worked on contouring the edge of the engine pocket track. I cut back the Homasote to match the height of the pink foam.
This is how it worked out.
I found some wall casting in the storeroom. I reduced their height to 2 1/4 inches and cut them for a matched fit. It looks like they will work out so next week I will bond them in place.
Repositioned foreground buildings.
The above photo is of the block east of the prior one.
This is the east end of the above block.
Today I worked on contouring the edge of the engine pocket track. I cut back the Homasote to match the height of the pink foam.
This is how it worked out.
I found some wall casting in the storeroom. I reduced their height to 2 1/4 inches and cut them for a matched fit. It looks like they will work out so next week I will bond them in place.
Repositioned foreground buildings.
Friday, February 8, 2013
NAPM Backdrop Buildings
Magnuson department store. It has been chopped at an angle for placement against the backdrop. All of the backdrop building have been configured in that manner, it really enhances their appearance. I have painted the model to appear as thought it was built from cut limestone blocks with a pinkish sandstone for the window cornices and trim. I painted the walls with Polyscale Antique White and the trim with aged concrete (this happened to be a pinkish batch of aged concrete). I like to use Dr. Bens aging solutions, I used very dilute black on all surfaces. Next I used Dr. Bens pigments ( #1380 Silverton Gold and # 1377 Ocher Russet) to color the limestone.
Monday, February 4, 2013
Napm Backdrop Buildings
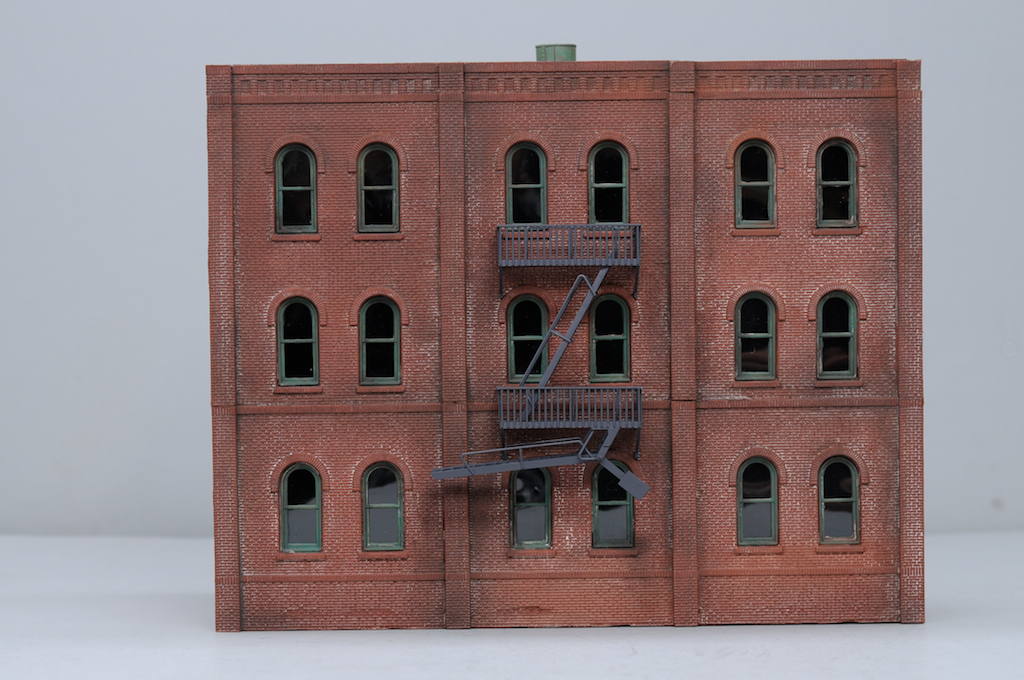
DPM modular with Walthers fire escape
Magnuson Tinkers Washer Works wall sections stacked up with Walthers fire escapes
Rear of Magnuson Model, not sure which one, possibly the department store.
Rear of City Classics building
These are the latest creations for the next block on the NAPM backdrop. These are face on pictures, the buildings are actually angled when placed on the layout.
Magnuson Tinkers Washer Works wall sections stacked up with Walthers fire escapes
Rear of Magnuson Model, not sure which one, possibly the department store.
Rear of City Classics building
These are the latest creations for the next block on the NAPM backdrop. These are face on pictures, the buildings are actually angled when placed on the layout.
Subscribe to:
Posts (Atom)


.jpg)